
How to Connect a 4K PTZ Camera to OBS Studio (USB, HDMI, SDI & NDI Setup Guide)
Featuring the SZOOMSY 4K PTZ Camera
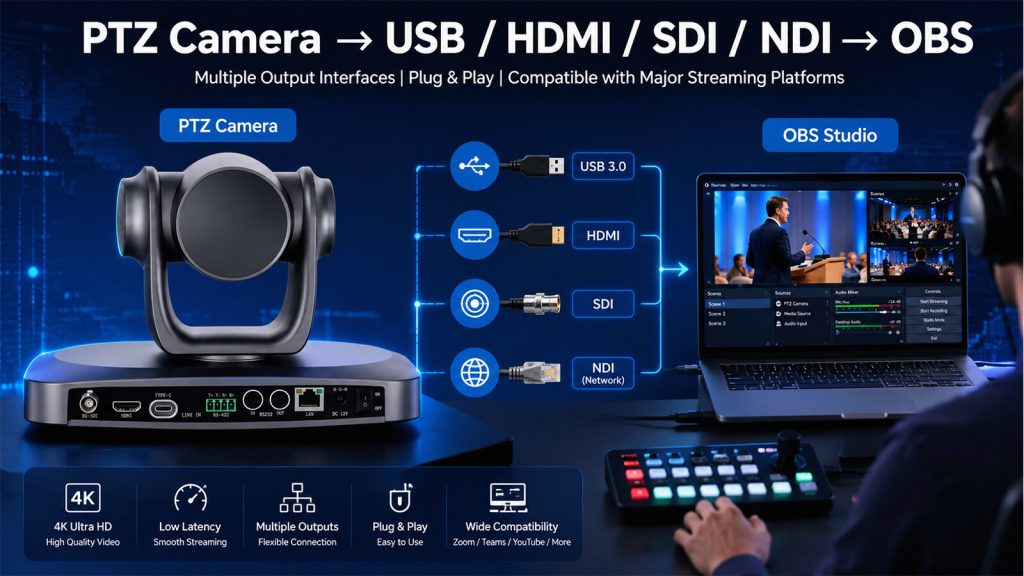
Learn how to connect a 4K PTZ camera to OBS Studio using USB, HDMI, SDI or NDI. Follow this step-by-step setup guide for live streaming, church services, conferences and professional video production.
A Complete Step-by-Step Guide for USB, HDMI, SDI & NDI Connections
If you’re setting up a PTZ camera for OBS Studio, choosing the right connection method is one of the most important steps. Whether you’re live streaming church services, business conferences, online classes, or professional events, OBS Studio supports multiple video input options, including USB, HDMI, SDI, and NDI.
In this guide, we’ll use the SZOOMSY 4K PTZ Camera as an example to explain how each connection method works, how to configure OBS correctly, and which option is best for your streaming environment.
- Which Connection Method Should You Choose?
- USB 3.0 Setup
- HDMI Setup
- SDI Setup
- NDI Setup
- Recommended OBS Settings
- Common Troubleshooting
- Frequently Asked Questions
| Connection | Video Quality | Latency | Extra Hardware | Best For |
|---|---|---|---|---|
| USB 3.0 | ★★★★☆ | Low | No | Meetings & Online Classes |
| HDMI | ★★★★★ | Very Low | Capture Card | Professional Streaming |
| SDI | ★★★★★ | Very Low | SDI Capture Card | Broadcast & Large Venues |
| NDI | ★★★★★ | Low | Network Switch | Multi-Camera Production |
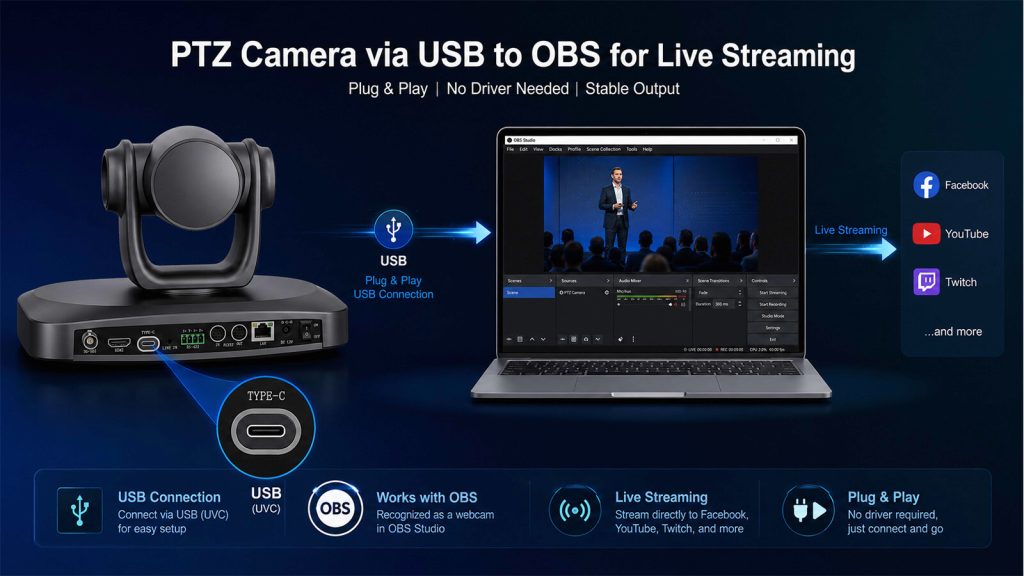
USB Connection
Best For
- Home Streaming
- Online Meetings
- Online Teaching
Pros
- Plug and Play
- No Capture Card Required
- Easy Setup
Cons
- Cable Length Limited
- Single Camera Workflow
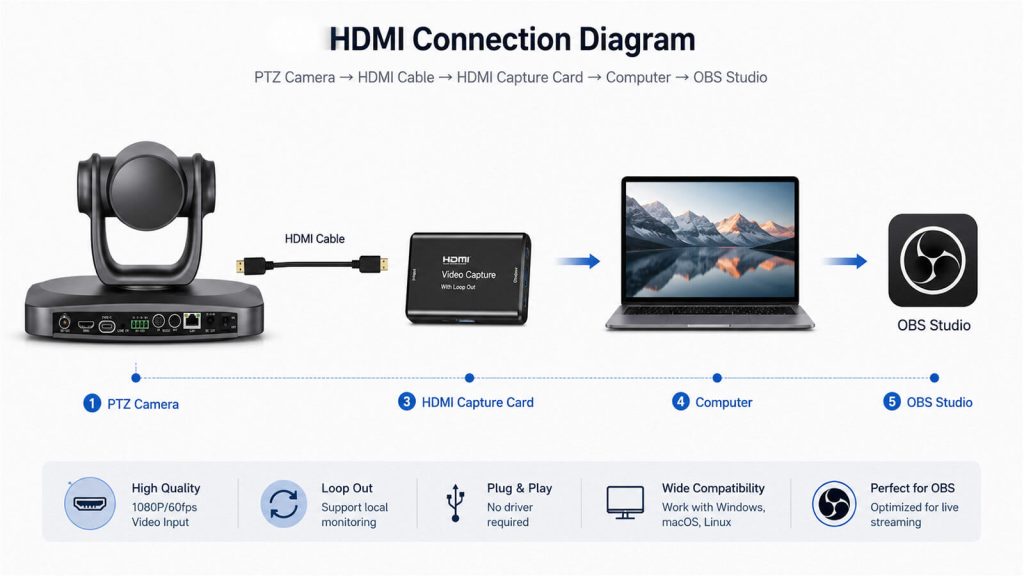
HDMI Connection
Best For
- Professional Live Streaming
- Church Production
- Conference Events
- Broadcast Studios
- High-Quality Single-Camera Production
Advantages
- ✔ Uncompressed 4K Video Output
- ✔ Stable and Reliable Signal
- ✔ Excellent Image Quality
- ✔ Compatible with Most HDMI Capture Cards
Limitations
- Requires an HDMI capture card.
- HDMI cable length is limited compared to SDI.
- Adds an extra hardware device to the workflow.
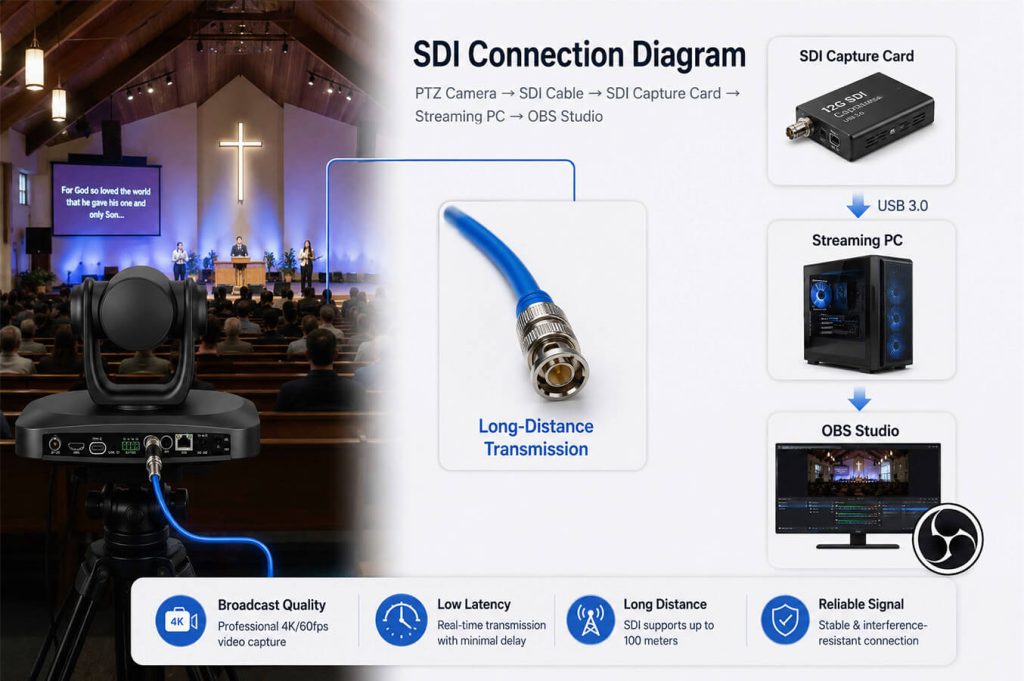
SDI Connection
Best For
- Professional Broadcast Studios
- Church Live Production
- Conference Halls
- Sports Events
- Large Venue Installations
Why Do Professional Broadcasters Prefer SDI?
Unlike HDMI, SDI (Serial Digital Interface) is specifically designed for professional video production. It provides stable, low-latency video transmission over long distances, making it the preferred choice for broadcast studios, houses of worship, conference centers, and live event production.
With SDI, video signals can travel much farther than HDMI without noticeable signal degradation, allowing cameras to be installed hundreds of feet away from the production desk while maintaining excellent image quality.
Advantages
- ✔ Reliable long-distance video transmission
- ✔ Low-latency, broadcast-quality signal
- ✔ Secure cable locking for stable connections
- ✔ Ideal for permanent AV installations
- ✔ Widely used in professional production environments
Limitations
- Requires an SDI capture card or SDI video switcher.
- SDI cables are generally more expensive than HDMI cables.
- Best suited for professional AV systems.
Step-by-Step Setup
Step 1: Connect the Camera
Use a high-quality 12G-SDI coaxial cable to connect the SDI OUT port of the PTZ camera to the SDI IN port of your SDI capture card or video switcher.
Step 2: Connect the Capture Device
Connect the SDI capture card to your computer using USB 3.0 or PCIe, depending on the hardware.
Step 3: Launch OBS Studio
Open OBS Studio.
Go to:
Sources → + → Video Capture Device
Create a new video source.
Step 4: Select the SDI Capture Device
Choose your SDI capture hardware from the device list.
Examples include:
- Blackmagic Design
- Magewell
- AJA
- Datavideo
Step 5: Configure Video Settings
Recommended OBS settings:
| Setting | Recommended Value |
|---|---|
| Resolution | 3840 × 2160 or 1920 × 1080 |
| Frame Rate | Match the camera output |
| Color Space | Rec.709 |
| Buffering | Disable (if the system is stable) |
Click OK to confirm.
Pro Tips
- Use broadcast-grade SDI cables for the most reliable signal.
- Ensure the camera output format matches the capture device.
- For long cable runs, SDI is generally a better choice than HDMI.
- Test the video feed before starting your live production.
Common Issues
| Problem | Solution |
|---|---|
| No video signal | Check that the SDI cable is securely connected and the capture card is recognized by OBS. |
| Unsupported resolution | Make sure the camera output matches the supported format of the SDI capture device. |
| Signal instability | Replace damaged SDI cables or use certified broadcast-quality cables. |
| No audio | Verify that embedded SDI audio is enabled or configure an external audio source. |
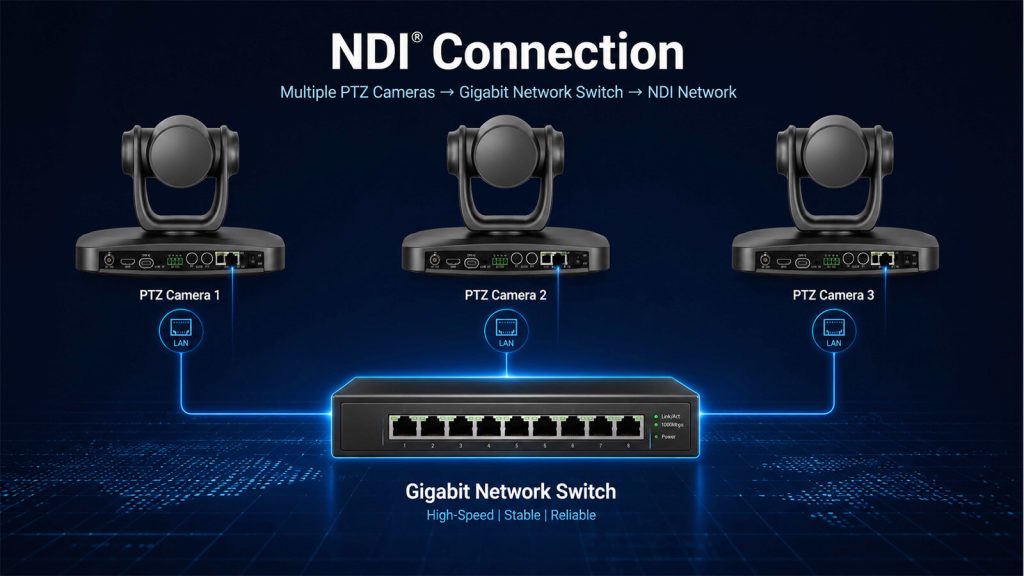
NDI Connection
Best For
- Multi-Camera Live Streaming
- Church Production
- Broadcast Studios
- Conference Rooms
- Education & Lecture Capture
Advantages
- ✔ One Network Cable for Video, Audio and Control
- ✔ No Capture Card Required
- ✔ Easy Multi-Camera Expansion
- ✔ Low-Latency IP Video Transmission
- ✔ Flexible Network-Based Workflow
Limitations
- Requires a Gigabit network.
- NDI Tools or NDI plugin must be installed.
- Network configuration may be required for first-time setup.
Why Choose NDI?
Unlike traditional HDMI or SDI connections, NDI (Network Device Interface) allows video, audio, PTZ control, and camera management to travel through a single Ethernet cable. This simplifies installation while making multi-camera production much easier to scale.
One Network Cable
Transmit video, audio, PTZ control, and power (when supported by PoE) through a single network connection, reducing cable clutter and simplifying installation.
Multiple Cameras
Connect multiple PTZ cameras to the same Gigabit network and switch between them directly in OBS Studio without adding additional capture cards.
Low Latency
NDI delivers high-quality, low-latency video over a standard IP network, making it ideal for professional live streaming and real-time production.
Centralized Management
Manage camera settings, presets, pan, tilt, and zoom remotely through the network, improving operational efficiency.
Easy Expansion
As your production grows, simply add more NDI cameras to the network without rebuilding your entire video workflow.
Step-by-Step Setup
Step 1: Connect the Camera to Your Network
Connect the LAN port of the PTZ camera to a Gigabit network switch using a CAT6 Ethernet cable.
Ensure that both the camera and your streaming computer are connected to the same local network.
Step 2: Enable NDI
Log in to the camera’s web interface.
Enable the NDI Output function.
Save the settings and restart the camera if necessary.
Step 3: Add the Camera to OBS
Install NDI Tools and the OBS NDI plugin.
Restart OBS Studio.
Go to:
Sources → + → NDI Source
Select your PTZ camera from the device list.
Click OK.
The live video will now appear in OBS.
Pro Tips
- Use a Gigabit managed switch for the best network performance.
- Keep all NDI devices on the same subnet.
- Use CAT6 cables for reliable high-bandwidth transmission.
- Assign a static IP address for permanent installations.
Common Issues
| Problem | Solution |
|---|---|
| Camera not found | Verify that both devices are on the same network and NDI is enabled. |
| High latency | Check network bandwidth and avoid overloaded switches. |
| No video | Restart OBS and confirm the NDI Source is selected correctly. |
| Unstable connection | Use Gigabit switches and high-quality CAT6 cables. |
Choosing the right connection method depends on your workflow, budget, and production requirements. USB is ideal for simple plug-and-play setups, HDMI and SDI are excellent for professional video quality, while NDI offers the greatest flexibility for multi-camera productions.
If you’re planning a church streaming system, conference room installation, or professional live production workflow, explore SZOOMSY’s range of 4K PTZ cameras, NDI solutions, and video accessories to build a reliable and scalable system.