Learn how to connect a 4K PTZ camera to OBS Studio using USB, HDMI, SDI or NDI. Follow this step-by-step setup guide for live streaming, church services, conferences and professional video production.
A Complete Step-by-Step Guide for USB, HDMI, SDI & NDI Connections
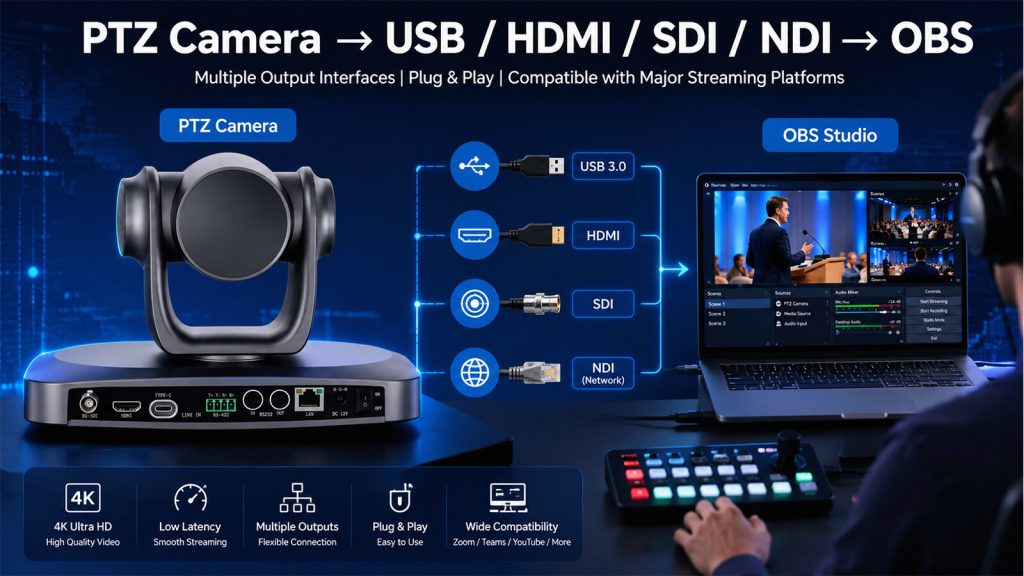
If you’re setting up a PTZ camera for OBS Studio, choosing the right connection method is one of the most important steps. Whether you’re live streaming church services, business conferences, online classes, or professional events, OBS Studio supports multiple video input options, including USB, HDMI, SDI, and NDI.
In this guide, we’ll use the SZOOMSY 4K PTZ Camera as an example to explain how each connection method works, how to configure OBS correctly, and which option is best for your streaming environment.
Which Connection Method Should You Choose?
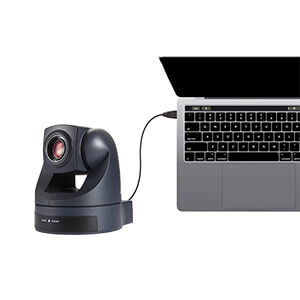
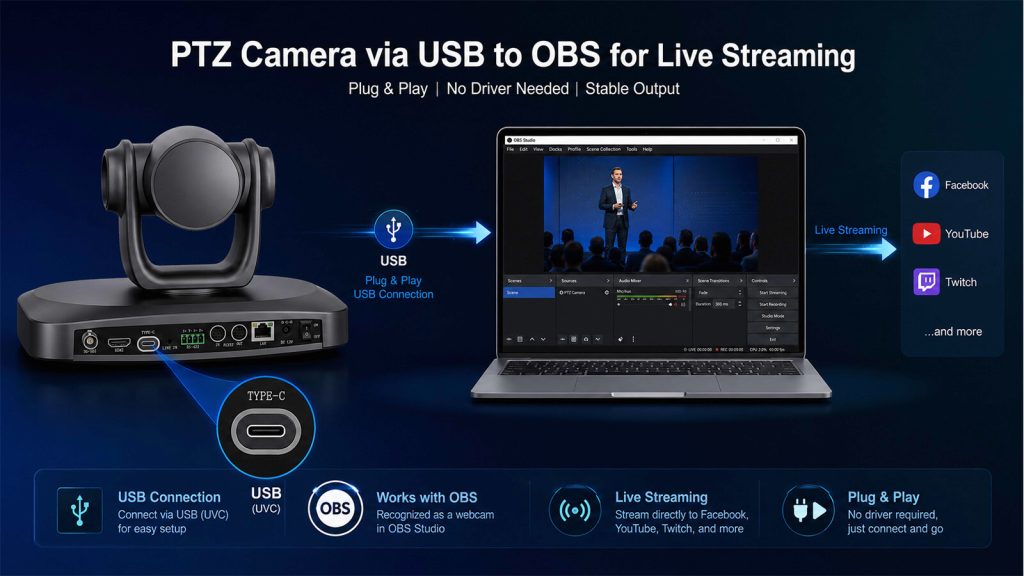
USB 3.0 Setup
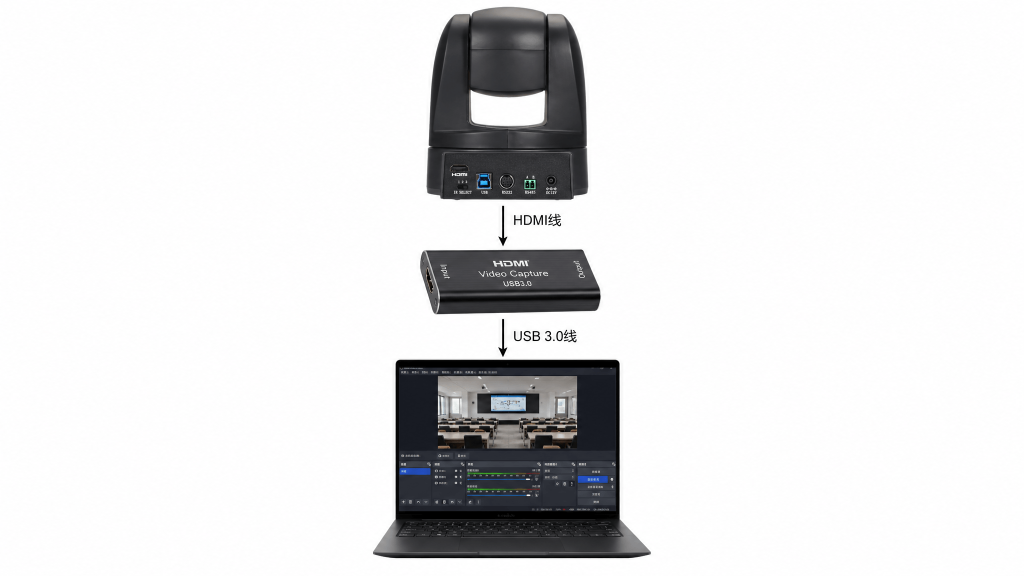
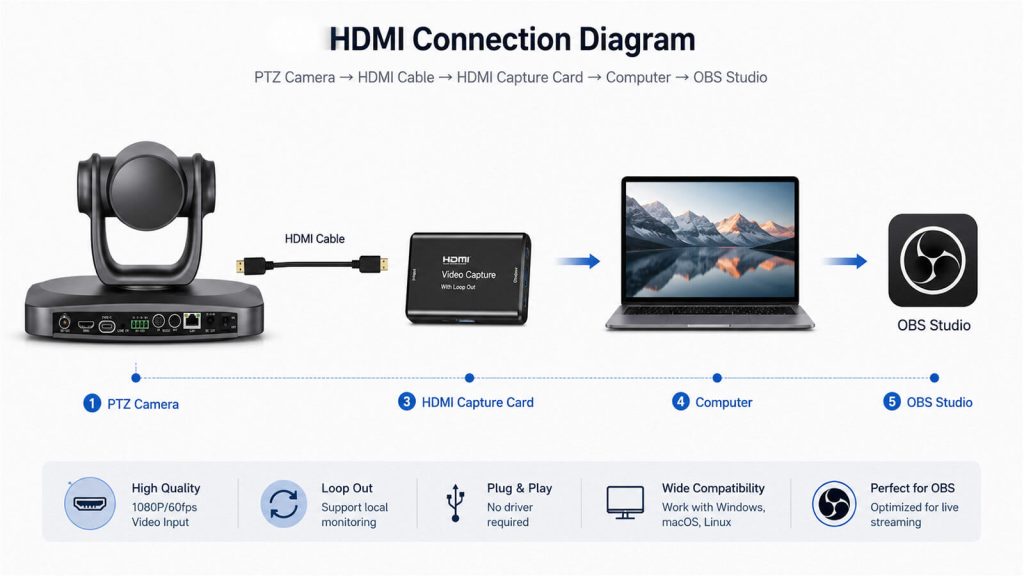
HDMI Setup
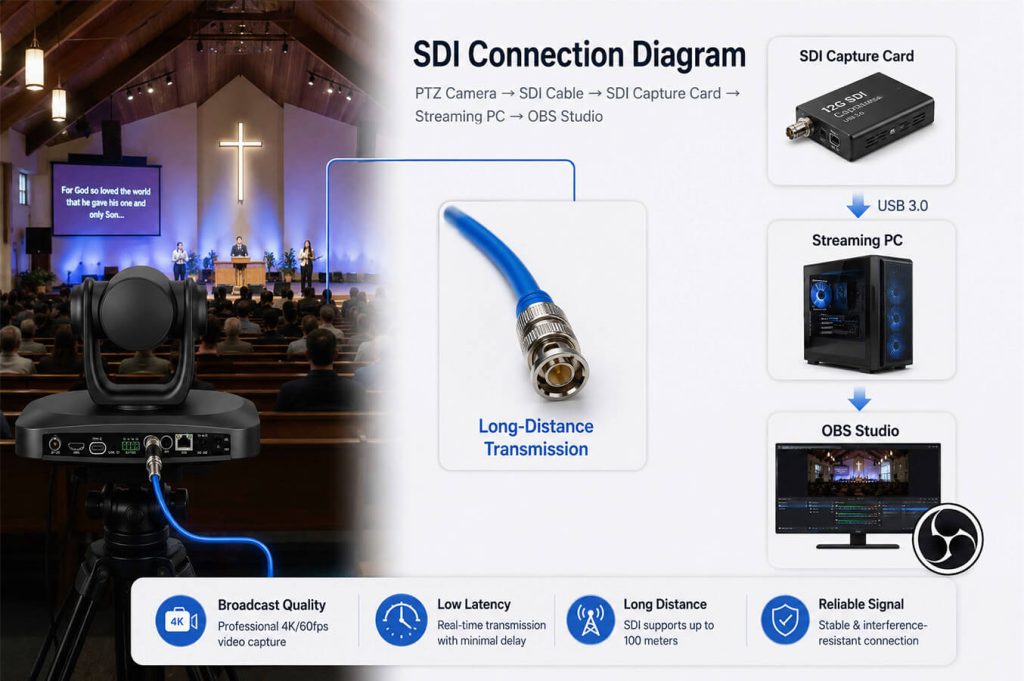
SDI Setup
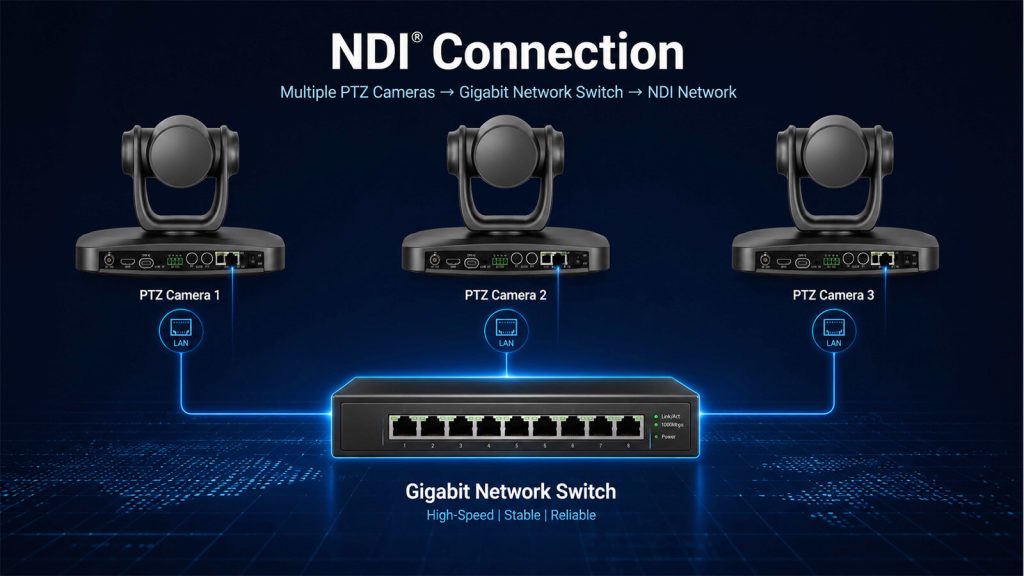
NDI Setup
Recommended OBS Settings
Common Troubleshooting
Frequently Asked Questions
Connection
Video Quality
Latency
Extra Hardware
Best For
USB 3.0
★★★★☆
Low
No
Meetings & Online Classes
HDMI
★★★★★
Very Low
Capture Card
Professional Streaming
SDI
★★★★★
Very Low
SDI Capture Card
Broadcast & Large Venues
NDI
★★★★★
Low
Network Switch
Multi-Camera Production
USB Connection
Best For
Home Streaming
Online Meetings
Online Teaching
Pros
Plug and Play
No Capture Card Required
Easy Setup
Cons
Cable Length Limited
Single Camera Workflow
HDMI Connection
Best For
Professional Live Streaming
Church Production
Conference Events
Broadcast Studios
High-Quality Single-Camera Production
Advantages
✔ Uncompressed 4K Video Output
✔ Stable and Reliable Signal
✔ Excellent Image Quality
✔ Compatible with Most HDMI Capture Cards
Limitations
Requires an HDMI capture card.
HDMI cable length is limited compared to SDI.
Adds an extra hardware device to the workflow.
SDI Connection
Best For
Professional Broadcast Studios
Church Live Production
Conference Halls
Sports Events
Large Venue Installations
Why Do Professional Broadcasters Prefer SDI?
Unlike HDMI, SDI (Serial Digital Interface) is specifically designed for professional video production. It provides stable, low-latency video transmission over long distances, making it the preferred choice for broadcast studios, houses of worship, conference centers, and live event production.
With SDI, video signals can travel much farther than HDMI without noticeable signal degradation, allowing cameras to be installed hundreds of feet away from the production desk while maintaining excellent image quality.
Advantages
✔ Reliable long-distance video transmission
✔ Low-latency, broadcast-quality signal
✔ Secure cable locking for stable connections
✔ Ideal for permanent AV installations
✔ Widely used in professional production environments
Limitations
Requires an SDI capture card or SDI video switcher.
SDI cables are generally more expensive than HDMI cables.
Best suited for professional AV systems.
Step-by-Step Setup
Step 1: Connect the Camera
Use a high-quality 12G-SDI coaxial cable to connect the SDI OUT port of the PTZ camera to the SDI IN port of your SDI capture card or video switcher.
Step 2: Connect the Capture Device
Connect the SDI capture card to your computer using USB 3.0 or PCIe, depending on the hardware.
Step 3: Launch OBS Studio
Open OBS Studio.
Go to:
Sources → + → Video Capture Device
Create a new video source.
Step 4: Select the SDI Capture Device
Choose your SDI capture hardware from the device list.
Examples include:
Blackmagic Design
Magewell
AJA
Datavideo
Step 5: Configure Video Settings
Recommended OBS settings:
Setting
Recommended Value
Resolution
3840 × 2160 or 1920 × 1080
Frame Rate
Match the camera output
Color Space
Rec.709
Buffering
Disable (if the system is stable)
Click OK to confirm.
Pro Tips
Use broadcast-grade SDI cables for the most reliable signal.
Ensure the camera output format matches the capture device.
For long cable runs, SDI is generally a better choice than HDMI.
Test the video feed before starting your live production.
Common Issues
Problem
Solution
No video signal
Check that the SDI cable is securely connected and the capture card is recognized by OBS.
Unsupported resolution
Make sure the camera output matches the supported format of the SDI capture device.
Signal instability
Replace damaged SDI cables or use certified broadcast-quality cables.
No audio
Verify that embedded SDI audio is enabled or configure an external audio source.
NDI Connection
Best For
Multi-Camera Live Streaming
Church Production
Broadcast Studios
Conference Rooms
Education & Lecture Capture
Advantages
✔ One Network Cable for Video, Audio and Control
✔ No Capture Card Required
✔ Easy Multi-Camera Expansion
✔ Low-Latency IP Video Transmission
✔ Flexible Network-Based Workflow
Limitations
Requires a Gigabit network.
NDI Tools or NDI plugin must be installed.
Network configuration may be required for first-time setup.
Why Choose NDI?
Unlike traditional HDMI or SDI connections, NDI (Network Device Interface) allows video, audio, PTZ control, and camera management to travel through a single Ethernet cable. This simplifies installation while making multi-camera production much easier to scale.
One Network Cable
Transmit video, audio, PTZ control, and power (when supported by PoE) through a single network connection, reducing cable clutter and simplifying installation.
Multiple Cameras
Connect multiple PTZ cameras to the same Gigabit network and switch between them directly in OBS Studio without adding additional capture cards.
Low Latency
NDI delivers high-quality, low-latency video over a standard IP network, making it ideal for professional live streaming and real-time production.
Centralized Management
Manage camera settings, presets, pan, tilt, and zoom remotely through the network, improving operational efficiency.
Easy Expansion
As your production grows, simply add more NDI cameras to the network without rebuilding your entire video workflow.
Step-by-Step Setup
Step 1: Connect the Camera to Your Network
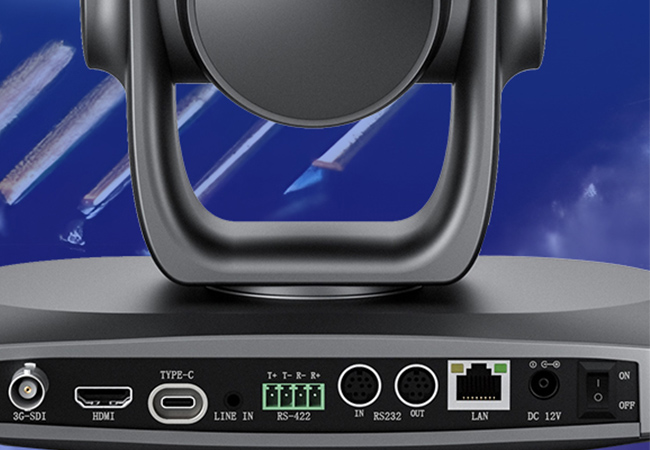
Connect the LAN port of the PTZ camera to a Gigabit network switch using a CAT6 Ethernet cable.
Ensure that both the camera and your streaming computer are connected to the same local network.
Step 2: Enable NDI
Log in to the camera’s web interface.
Enable the NDI Output function.
Save the settings and restart the camera if necessary.
Step 3: Add the Camera to OBS
Install NDI Tools and the OBS NDI plugin.
Restart OBS Studio.
Go to:
Sources → + → NDI Source
Select your PTZ camera from the device list.
Click OK.
The live video will now appear in OBS.
Pro Tips
Use a Gigabit managed switch for the best network performance.
Keep all NDI devices on the same subnet.
Use CAT6 cables for reliable high-bandwidth transmission.
Assign a static IP address for permanent installations.
Common Issues
Problem
Solution
Camera not found
Verify that both devices are on the same network and NDI is enabled.
High latency
Check network bandwidth and avoid overloaded switches.
No video
Restart OBS and confirm the NDI Source is selected correctly.
Unstable connection
Use Gigabit switches and high-quality CAT6 cables.
Choosing the right connection method depends on your workflow, budget, and production requirements. USB is ideal for simple plug-and-play setups, HDMI and SDI are excellent for professional video quality, while NDI offers the greatest flexibility for multi-camera productions.
If you’re planning a church streaming system, conference room installation, or professional live production workflow, explore SZOOMSY’s range of 4K PTZ cameras, NDI solutions, and video accessories to build a reliable and scalable system.
Start with Your Room Size: Match Camera Specs to Your Space
Choosing the right PTZ conference camera starts with understanding your meeting environment. Room size and seating capacity directly affect the zoom range, field of view, and video quality you need.
Meeting Room Type
Room Size
Capacity
Recommended Optical Zoom
Resolution
Field of View
Small Room
Up to 20㎡
1–6 people
10X Optical Zoom
1080P / 4K
70°–90°
Medium Room
20–40㎡
6–15 people
12X–20X Optical Zoom
4K Recommended
60°–80°
Large Room
40㎡+
15+ people
20X–30X Optical Zoom
4K @ 60fps
50°–70°
Auditorium / Lecture Hall
100㎡+
50+ people
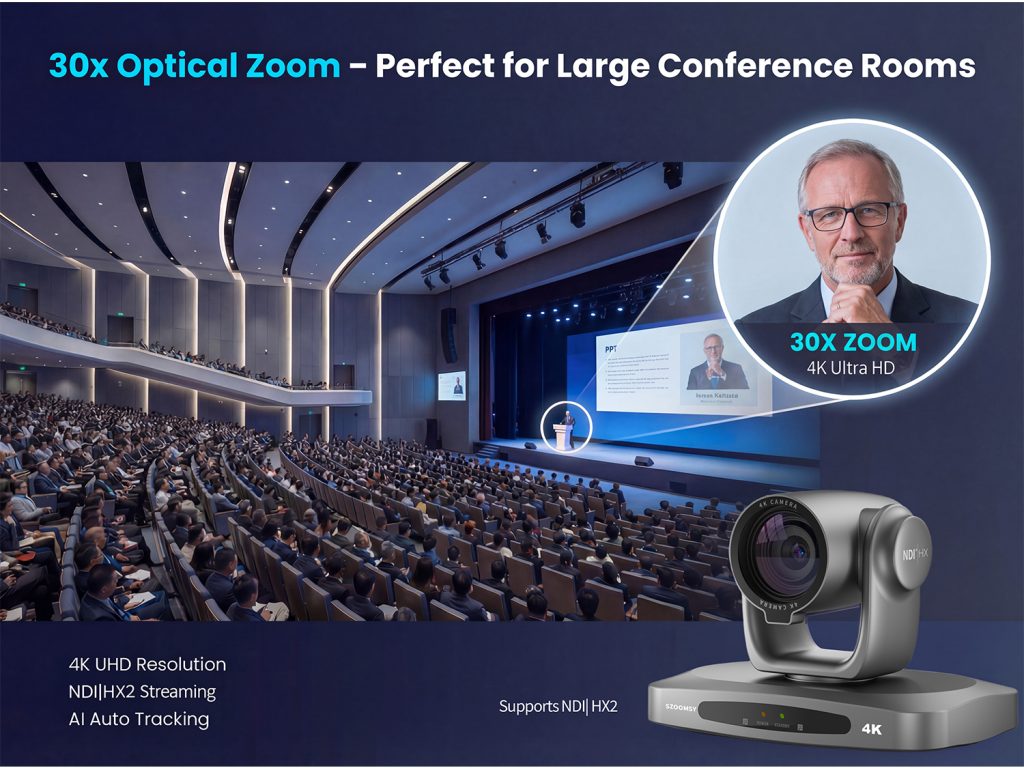
30X+ Optical Zoom
4K Broadcast Sensor
40°–60°
Key tip: The larger the room, the more optical zoom you need. A narrower viewing angle can help capture participants clearly from longer distances.
2.Key Features to Consider Before Buying
1) Resolution & Frame Rate: The Foundation of Video Quality
Video clarity is essential for modern meetings and hybrid collaboration.
4K (3840×2160) @ 30fps The most popular choice for conference rooms. Sharp image quality with excellent detail.
4K @ 60fps Best for premium meeting spaces, live presentations, and professional streaming.
1080P @ 60fps A reliable and budget-friendly option with universal software compatibility.
Pro tip: Choose cameras with built-in hardware encoding for smoother performance and lower latency.
2) Optical Zoom: One of the Most Important Features
Zoom capability determines how well the camera captures people at a distance.
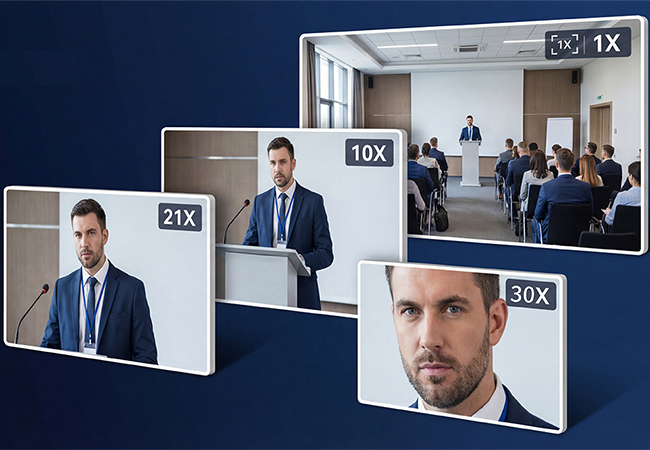
Optical Zoom (10X / 12X / 20X / 30X) Maintains full image quality with no loss of detail.
Digital Zoom Useful as a supplement, but image quality decreases at higher zoom levels.
Recommended by room size:
Small rooms: 10X–12X
Medium rooms: 20X
Large rooms / auditoriums: 30X+
3) PTZ Performance: Flexible and Smooth Camera Movement
A professional PTZ camera should move smoothly and quietly.
Recommended performance:
Pan: 340° or wider
Tilt: 120° or more
Speed: Adjustable from 1–120°/sec
Quiet motor design: Essential for distraction-free meetings
Fast movement helps during live switching, while slower movement allows precise framing.
4) Sensor & Low-Light Performance
Conference rooms often have uneven lighting. A strong sensor matters.
Look for:
1/2.8″ sensor or larger
8MP+ for 4K
2MP+ for 1080P
F1.8–F2.0 aperture
Auto Gain Control (AGC)
Noise reduction
Backlight compensation
Wide Dynamic Range (WDR)
These features improve image quality in low-light or mixed-light environments.
5) Connectivity & Compatibility
Flexible connectivity makes installation easier.
Interface
Best For
Recommended
USB 3.0 / 3.2
Plug-and-play video meetings
Essential
HDMI 2.0+
Local monitor / recording
Recommended
IP / LAN
Remote camera control
Essential for pro setups
**NDI
HX2**
Low-latency streaming
SDI
Long-distance broadcast video
Ideal for auditoriums
Before purchasing, confirm support for:
Zoom
Microsoft Teams
Google Meet
Cisco Webex
And camera control protocols:
VISCA
VISCA over IP
Pelco-D / Pelco-P
6) AI Smart Features for Better Meeting Efficiency
Modern PTZ conference cameras can automate framing and tracking.
Useful AI functions include:
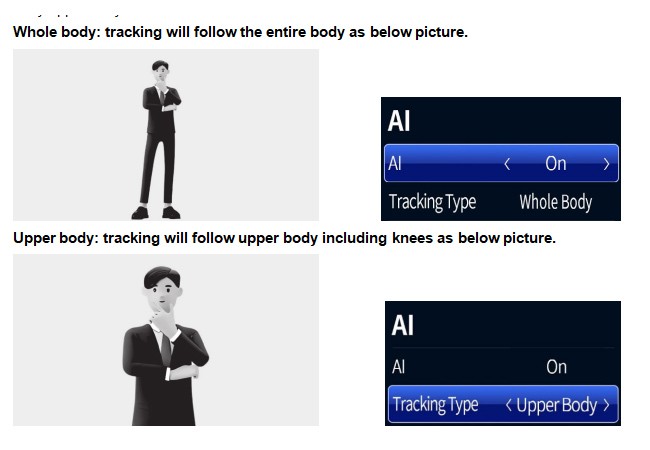
Auto Framing Automatically adjusts framing based on participant count.
Presenter Tracking Follows the active speaker or presenter.
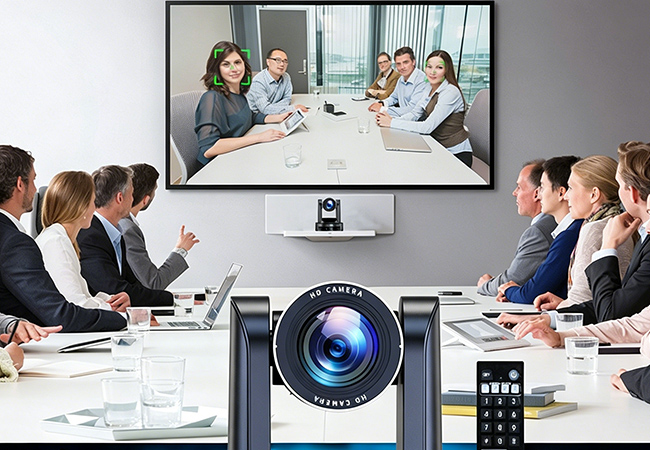
Face Detection / People Counting
AI Noise Reduction
Important: Some AI features may only work in specific video modes. Check product details before buying
SZOOMSY Expert Tips: Avoid Common Mistakes
1. Prioritize optical zoom over digital zoom
Optical zoom preserves image quality. For 20X or higher, optical zoom is strongly recommended.
2. 4K isn’t always the best choice
If bandwidth is limited, 1080P @ 60fps may deliver a smoother meeting experience.
3. Adjustable PTZ speed matters
Fast for switching. Slow for precise framing.
4. More connectivity means more flexibility
USB + HDMI + IP is a highly practical combination.
5. Choose AI features based on your real needs
Small rooms may not need advanced speaker tracking.
Perfect for desktops, wall mounting, and plug-and-play meetings.
Medium Conference Rooms (6–15 people)
Recommended:SZOOMSY 4K 20X PTZ Conference Camera
Features:
4K UHD
20X optical zoom
54° FOV
USB + HDMI + IP
AI Auto Framing
Ideal for business meetings, training rooms, and classrooms.
Large Meeting Rooms & Auditoriums
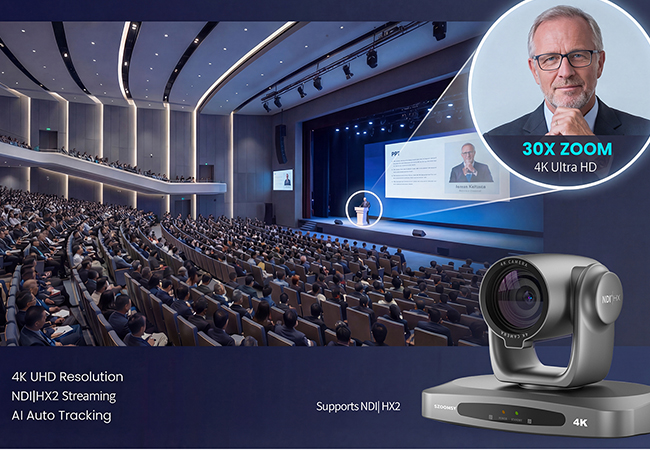
Recommended:SZOOMSY 4K 30X Professional PTZ Camera
Features:
4K @ 60fps
30X optical zoom
60° field of view
NDI + SDI + HDMI + IP
Full AI tracking
Built for enterprise, universities, and government spaces.
Livestreaming & Multi-Camera Production
Recommended:SZOOMSY 4K 20X NDI PTZ Camera
Features:
4K UHD
20X optical zoom
NDI|HX2 low-latency video
Tally light
Multi-protocol control
Perfect for:
Church live streaming
Corporate events
Education
Multi-camera production
Final Thoughts
The best PTZ conference camera isn’t simply the one with the highest specs—it’s the one that fits your room, workflow, and budget.
By matching your application with the right optical zoom, video resolution, AI features, and connectivity, you’ll create a more professional and efficient meeting experience.
Explore SZOOMSY PTZ conference camera solutions and find the right camera for your next meeting or live production setup.
Our healthcare audio and video solutions, powered by professional PTZ cameras and 360° omnidirectional speakerphones, provide a stable and reliable foundation for telemedicine, surgery teaching, multi-disciplinary consultation, remote ward rounds, and medical training. These solutions help hospitals and medical institutions build an efficient audio and video collaboration system, allowing high-quality medical resources to cover every corner of the region.
Core Pain Points in Medical Scenarios
Uneven distribution of high-quality medical resources, making it difficult for grassroots patients to access expert services
Poor audio and video quality in complex environments such as operating rooms and consultation rooms, affecting the accuracy of diagnosis
Complicated equipment operation, which is difficult for busy medical staff to use quickly
Lack of stable live broadcast and recording solutions for surgery teaching and continuing education
Difficult system compatibility, making unified management across departments inefficient
Our Core Hardware
PTZ Cameras: 4K/1080P high-definition picture quality, optical zoom, and pan-tilt control, which can clearly present details such as surgical procedures and lesions
Speakerphones & Omnidirectional Microphones: 360° sound pickup, 6-12 meters of clear pickup, AI noise reduction, and echo cancellation to ensure that every conversation is heard clearly
Controllers & Expansion Devices: Support multi-camera linkage and cascading microphones, which can easily cover large spaces such as operating rooms and lecture halls
Multi-Platform Compatibility: Supports Windows, macOS, Linux, Android, and mainstream medical consultation terminals
Key Advantages of Our Solution
1. Ultra-clear video for every detail
Our PTZ cameras provide stable, low-latency high-definition images, which can clearly capture surgical details and patient conditions, helping experts make accurate judgments.
2. Crystal-clear audio without noise or echo
The omnidirectional speakerphone uses advanced noise reduction and echo cancellation technology to eliminate environmental interference, ensuring that conversations between doctors and patients are clear and smooth.
3. Plug-and-play, zero training required
USB and wireless connections allow the equipment to be used immediately without complicated settings, which is very suitable for the fast-paced working environment of medical staff.
4. Support for multi-camera linkage
Multiple PTZ cameras can be deployed in operating rooms and teaching halls to realize multi-angle shooting and live broadcast, meeting the needs of surgery teaching and training.
Typical Application Scenarios
1. Telemedicine & Remote Expert Consultation
Connect grassroots hospitals with top experts to realize remote diagnosis, case discussion, and consultation, so that patients can enjoy expert-level medical services without traveling far.
2. Surgery Broadcast & Medical Teaching
Live broadcast surgery procedures to teaching halls or other hospitals to realize remote teaching and training for young doctors. It also supports recording and archiving to build a reusable teaching resource library.
3. MDT Multi-Disciplinary Consultation
Realize online joint diagnosis by experts from multiple departments such as internal medicine, surgery, imaging, and pathology to provide comprehensive treatment plans for complex cases.
4. Remote Ward Rounds & Patient Monitoring
Deploy cameras and audio equipment in wards to realize remote rounds and two-way voice communication, reducing the workload of nurses and improving the efficiency of patient monitoring.
Customer Benefits
Effectively solve the problem of uneven distribution of medical resources
Reduce hospital training and communication costs
Improve the accuracy of diagnosis and treatment and patient satisfaction
Build a standardized and replicable smart medical audio and video system
Realize the precipitation and inheritance of high-quality teaching resources
Need a Custom Healthcare AV Solution?
Contact our team for a tailored solution based on your hospital’s needs.